


With the rise of cannabis cultivation, and after receiving so many questions from many people who begin to grow cannabis indoors do not get expected results, we felt obliged to make several general recommendations to new growers from our experience of growing with some prominent commercial growers. Following these tips, you will achieve a quality harvest without unforeseen events.
#1 Always remember safety is the top priority
There are three key safety risks anticipated from growing indoor: 1) electrical and fire hazards; 2) inappropriate use of pesticides and fertilizers; 3) water damage. These risks may be present during cannabis cultivation, harvesting, and handling, and as a result, there may be concomitant existence of each of these types of risks.
Fires are a significant concern since improper wiring of the lights and fans can lead to a short circuit. This is especially likely when the electricity is set up by amateurs who mess with the cupboard circuit. The indoor grower should carefully avoid messing with the circuit board or using terminal blocks and make sure to cut all cables to the correct size. Buy only reputable brands and always place equipment away from a water tap or tank to avoid accidents. Keep in mind, fires caused by an indoor cannabis garden aren’t going to be paid for by insurance.
Cannabis cultivation can be impacted by a number of pests including moulds, blights, and insects that attack living plants, as well as fungi that attack dead plants as they are being dried or cured. Because of the time and cost required to complete a full cannabis cultivation cycle, growers may adopt risky pest control practices to avoid crop loss. Although the current PMRA-approved products are generally considered low-risk, novice growers should strictly follow the guidance provided on product labels, particularly with respect to general provisions for indoor use. Also, most fertilizers can be extremely irritating to the eyes, mouth, or open sores. To prevent harm, always read the instructions and learn what to do in case of accidents. For the most part, it’s just a matter of common sense. For example, using protective gear like gloves or goggles minimizes the chances of injury.
Water damage is another potential concern since a water tank could overflow – especially when you grow hydroponically. In addition, a constantly damp room can cause the floor to rot and the cement to get porous. In a worst-case scenario, molds may grow and wreak havoc to the crop or to the grower’s health. The best way to reduce the risk of water-related problems is to waterproof the grow room’s floor and walls. This creates a moisture-free room that makes tending to the plants a lot easier. Also, don’t forget to turn off the tap to avoid any flooding. Better yet, place the water tank in the shower to lower the risk.
#2 Choose a good genetics for cannabis cultivation
Good genetics is essential to achieve a good harvest. Good genetics is the one that in addition to producing good cannabis, adapts to your level of knowledge as a grower. There are currently many seed banks that offer a wide range of varieties among regular, auto-flowering and feminized seeds.
Remember: Only female plants will produce buds. You can make sure to have female plants by using feminized seeds.
For indoor novice growers, we recommend first-generation hybrids, which tend to give fewer problems with pests and nutrition.
Indica hybrids. The easiest cannabis cultivation varieties to grow indoors are, for example, the Critical Bilbo, ready in just 50 days to 12 hours of daylight daily. Another suitable variety for the first crops is the White Widow, although it takes 60 days to bloom, it is resistant to most pests and is difficult to overfertilize (one of the most frequent mistakes in new growers).
For larger growing rooms, Indian phenotypes have the advantage of being easy to a manicure and need less pruning during their growth. In addition, having short flowering cycles of only 8 weeks, pests have little time to settle in plants and with a few preventive treatments is usually enough to control them. Some of the most cultivated varieties are Industrial Plant or Afghan Kush xBlack Domina.

Sativa hybrid. Those who carry a few crops will feel like trying new varieties, so you can start choosing hybrids with more Sativa genetic load. Sativa hybrid varieties take longer to bloom, so the risk of suffering from some type of pest is higher (simply because they spend more time in the growing room). However, they offer a wider range of flavors and different from what we are used to seeing in cannabis cultivation social clubs. We recommend that you try White Russian varieties of Serious Seeds or High Level of EVA Seeds, which will surprise you both for their high production and for their taste and smell. Sativas delight us with a more stimulating and less narcotic effect than most varieties that are grown commercially.
Sativa. For advanced growers wanting to try special things, we recommend these varieties of cannabis Sativa. The more Sativa varieties have greater commercial value because they require a lot of hand and delicacy to grow, but they can surprise us if they are grown well. Some varieties can be three months blooming indoors (and stretching!), And not all of us are trained to grow them properly. Among our favorites is Jack Herer of Greenhouse and Kali Mist of Serious seeds, both winners of numerous awards. Many professions in the sector consider these types of plants as the best varieties of cannabis. Before planting a variety of cannabis Sativa we must ask in our grow shop how many weeks it needs to finish flowering, and thus avoid surprises.

Indica. Currently, the trend in social clubs of cannabis is the present elite of the kush family ( kush strains ). These plants are entering strongly from Canada and the United States, where their cultivation was already perfected a few years ago, and it seems that they are the new fashion among the most advanced growers.
Indica cannabis usually consumes little water and also requires a poorer fertilization program than first and second-generation hybrids. Many people fail with this type of seeds, being accustomed to hybrids that consume large amounts of water and nutrients. It is advisable to grow them with organic fertilizer at half the dose of the recommended one.
Some of our customer’s favorite Indian cannabis strains are OG Grape, KryptandReCon, from DNA Genetics. These plants have great power and their flavor is very intense, with acidic touches that sometimes remind us of pine resin. Normally the productions they offer are medium and also their cultivation demands greater expertise.
#3 Decide your culture substrate and fertilizer
There are several mainstream substrates for growing cannabis, comprising an extensive selection of culture media as substrates based on peat and black or inert substrates for hydroponics as coconut, the arlita, the mapito or wool rock. Each substrate offers different characteristics, a grower should always select the one that works best for their cultivation. For example, there are substrates with added fertilizer and perlite, which allow excellent oxygenation of the root system and which currently has great success especially in the indoor cannabis cultivation. Solid amendments, such as worm humus or guano, are additives to improve the physical-chemical properties of the soil, as they contain nutrients and organic matter, creating suitable sustenance for the development of cannabis plants.
Anyway, if you are not prepared to have a thorough understanding of various substrates, you can start growing with organic soil because it will also give you better results.
Novice growers are always better to start with organic fertilizers. The natural, organic cannabis fertilizer which is made with nutrient matter comes from living materials such as algae or natural plant extracts without chemical components is the best choice for the most foodies. They are fertilizers designed for organic soil substrates or for growers who prefer a crop of excellent quality overabundant production. The buds 100% organic have more flavor and aroma than other fertilizers. Organic fertilizers have carbon particles that, when in contact with the earth, are released by the fungi of the substrate providing nutrients to the plant.
Initially, organic lands already have sufficient nutrients for the first development of the plant, so we recommend waiting 2 weeks after the transplant for the first fertilizer irrigation. It is important to remember that organic fertilizers take between 7 and 10 days to take effect and present results. Natural fertilizers also have a great regulation of Ph, this facilitates the task of growers since you should not worry about the pH levels of water during cultivation.
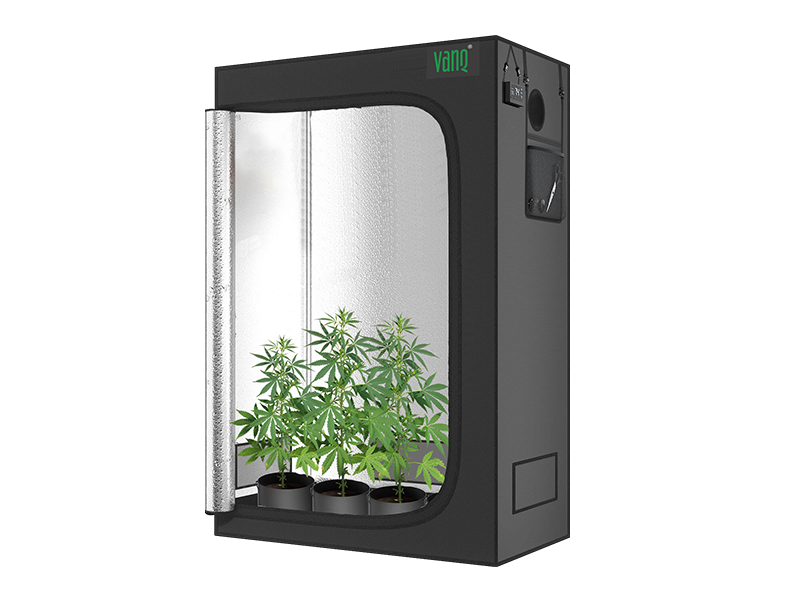
#4 Choose the right cultivation equipment for cannabis cultivation
When creating an indoor cultivation room, selecting the right equipment at the start is crucial to success.
First, sizing your systems for cannabis cultivation.
Due to the high heat load and water content associated with a garden, sizing systems for cannabis cultivation can be very different from sizing them for other environments. For example, it is better for beginners to calculate the dehumidification load of a cannabis garden to at least five gallons per light per day. If you have no certain idea to size a system correctly, please always talk to someone who knows more than you do-like engineers who specialize in cannabis cultivation equipment sizing.
Another important factor to determine the size of your operation is your budget, find out what equipment can be bought with that money, and then decide how big a garden can be built within that budget. It is important to point out that “find out what equipment can be bought” does not mean looking at the cheapest equipment and making decisions based upon that information. Instead, your yield goals and monthly expenses should be considered. Energy-efficient equipment is crucial to the ultimate bottom line of your equipment portfolio and should be considered from the start. By spending a little more money at the start to purchase good equipment, you’ll be able to save yourself time and money down the line, leading to more profits.
Then, buy them.
Ventilation System: Choose an open ventilation system that uses carbon exhaust filters to control orders for the best airflow in your indoor grow operation.
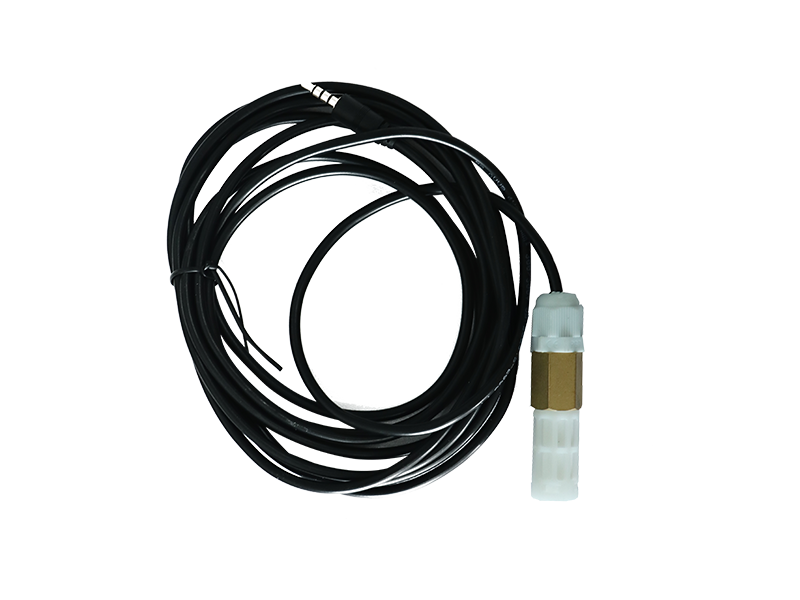
pH and TDS Measuring Equipment: Getting accurate pH and TDS measurements quickly and frequently are key to keeping an eye on the development of your cannabis plants. Choose measuring equipment that is accurate and doesn’t require frequent calibration, which can slow down operations or result in inaccurate readings.
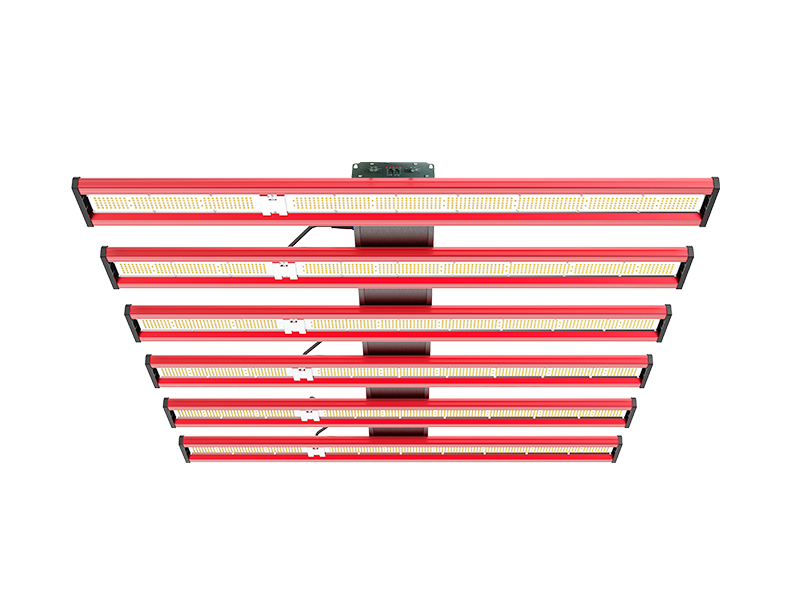
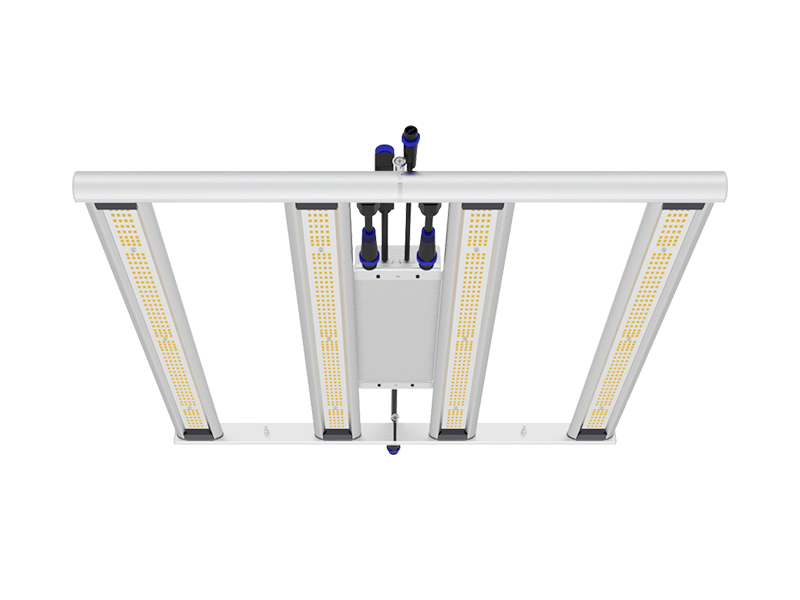
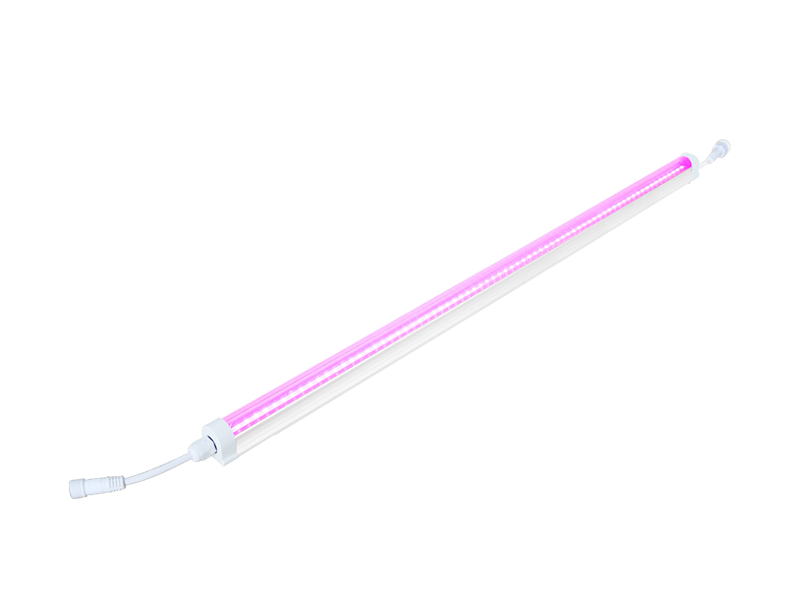
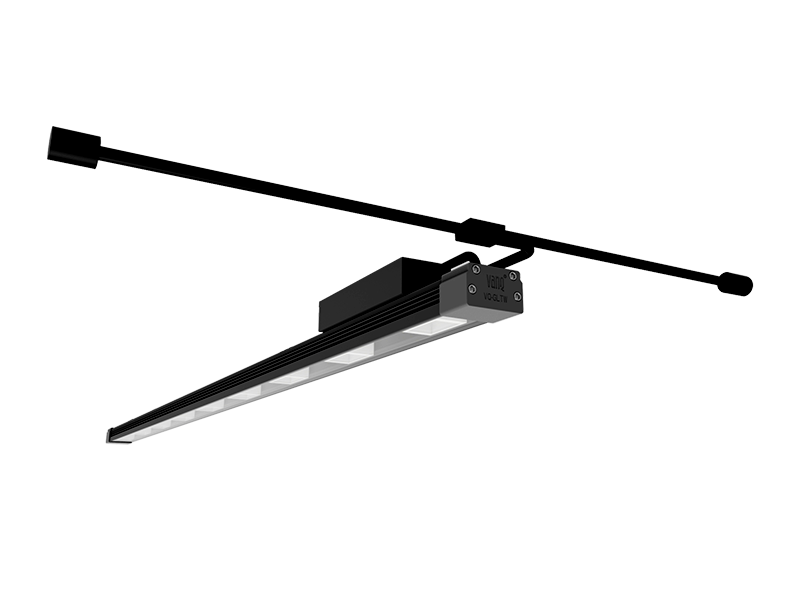
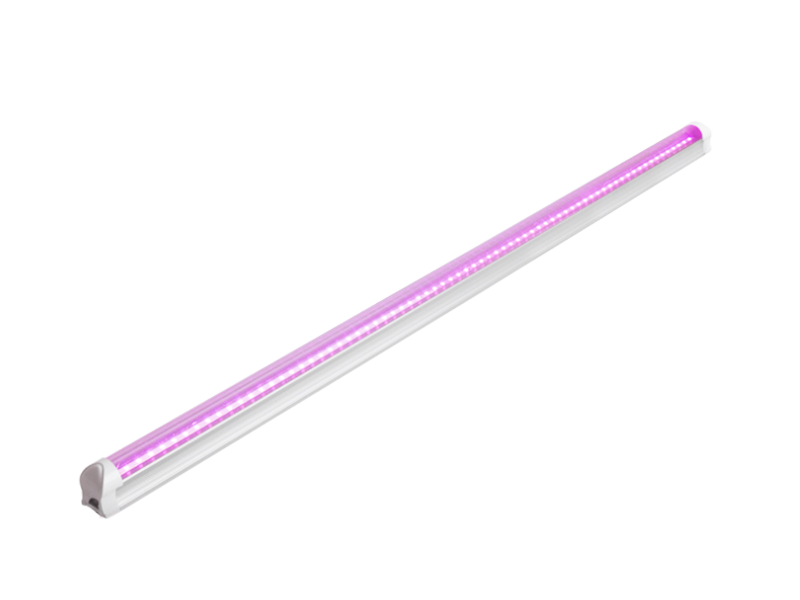
Indoor Plant Lighting: For indoor cannabis growers, there are many different options with regards to lighting. Your choice of lighting option will greatly depend on your region’s electrical rates and the layout of your indoor grow setup. Though HPS bulbs have been used in cannabis cultivation for a long time, LED grow lights with much better spectrum composition, up to 50% higher energy-efficiency, and 5 times longer lifetime is definitely more affordable than HPS in the long term.
Temperature Control: HVAC equipment is extremely important to keep your plants at the proper temperature. As stated above, your choice of lighting could increase cooling costs. For greenhouses, this will especially require a very precise temperature control system.
Humidity Control: Not only do your plants need the proper humidity to reach their full potential but having the wrong environment could lead to the growth of mold which could ruin your entire grow.
CO2 Generators: Add CO2 Carbon dioxide (CO2) is one of the most undervalued aspects of an indoor garden. Plants need CO2 to grow, and without sufficient levels, their growth will be stalled. Also, CO2 supplementation is one of the cheapest ways to boost production and increase plant yield. In sealed grow rooms, it is critical to add CO2 to give your plants a constant supply. Growers should enrich with CO2 to stimulate photosynthesis and enhance plant growth. CO2 uptake and assimilation are closely tied to light and temperature. The recommended CO2 enrichment level is about 1200 to 1500 ppm.
Trimming Equipment: Trimming can often be a bottleneck for commercial grow operations. Using commercial trimming equipment can help make the trimming process more efficient.
Gloves: For any employees handling your cannabis plants, gloves are a must for the protection of your workers and your grow. A cannabis industry study found that 18% of cannabis growers report skin irritation. Bacteria from your hands can also affect your plant health.
Antibacterials: Another way to prevent bacteria from infecting your grow is to set up wash stations with antibacterial soap or gel.
Magnifying Glass: Being able to see your cannabis is crucial for determining the quality and potency of your cannabis cultivation. Having a magnifying glass with LEDs is also very useful for spotting contaminants such as mold, mildew, hair, and bugs.
Eye Protection: Protect your eyes from harmful particles and vapors that are present during the cannabis growing process. Eye protection is especially important for anyone working with chemicals that could cause damage or irritation to the eyes.
Pesticide: Pests can be a major problem for cannabis cultivators. However, before using any chemicals to treat your plants, make sure you understand the federal and state legislation for using pesticides for cannabis plants in your state.
#5 Water your plants in the right way
Watering in cannabis cultivation is one of the most common operations, both in indoor and outdoor cultivation, so it is worth reviewing four basic concepts to get it right and get better results.

What kind of water?
Before you start planting, you should know what water you have available. In some areas, tap water is not suitable for the correct growth of cannabis. In this case, you can resort to bottles of bottled water or reverse osmosis devices (depending on the size of your crop).
How often?
There are a number of variables that make us water more often or less:
Large plants need more water than small plants.
Low relative humidity causes plants to need more water.
More heat means more need for water.
A flowering plant needs more water than a growing plant.
A large potted plant takes longer to dry than a small potted plant.
Flood irrigation is less frequent than normal irrigation (by gravity).
As a general rule, in an interior, it is watered every two or three days, if we water manually. Another story is the automatic irrigation systems with irrigation pumps and drippers, which usually give several waterings a day, but with little water volume.
To know if we have to water the plant, it is best to weigh a pot and look at the top layer of soil. We have to get used to the weight of the substrate in field capacity, to know:
Let's water little by little until it starts to drain water from the bottom.
Let the excess water drain for about thirty minutes, without any plate or tray underneath.
Weigh the pot, and we stay with the idea. From now on we want the plant to have more or less this amount of water always.
Now we will have to look at how long it takes the plants to lose water and dry a little, but not weigh very little
How much?
As an approximate idea, we can water a square meter indoors with about 10 or 15 liters. It will vary depending on what we have said before: plant size, stage, relative humidity, temperature ...
We recommend watering with between 10 and 20% of the volume of water with respect to the substrate:
In 5-liter pots indoors, a plant can be irrigated with half a liter or a liter of water at most.
But it is best to do what we have explained before, water the plants well and remember the weight of the pots. From there we will water so they always stay that way, with the same weight.
Pay attention to pH and EC
The acidity level of the mixture of water and nutrients is essential for the proper development of cannabis. Normally it is necessary to acquire a pH lower fire to maintain the pH values between 5.8 and 6.3. The electroconductivity is a measure of the concentration of salts in the water. An excess of fertilizer will slow down growth, while a lack of them will cause the appearance of deficiencies. The ideal water to irrigate the plants should have a starting EC as low as possible and fertilizers are added until they reach values 2 or 3 ms/cm, depending on the variety and the stage in which the cannabis plant is located.
#6 Install the grow lights according to the plants' surface.
Do not expect that by putting more plants with the same focus you will get more harvest. Cannabis plants need about 40-50w of LED light per square meter to bloom properly.
Check the PPFD footprint map of the grow light
We know that mature weed plants want 600-800 PPFD to be stimulated. This means that we need to adjust our grow light so that we project this intensity onto our plants. PPFD levels can be regulated with distance. As photons spread, the further the distance between plant and light source is, the less intense the light will become as the photons spread sideways, away from the plant.
The general theory behind distance:intensity: the footprint is:
Short or no distance between lamp and plant: high PPFD (light intensity) but the small light footprint (coverage area).
Long-distance, let’s say 2’ (61cm) between lamp and plant: low PPFD but large light footprint.
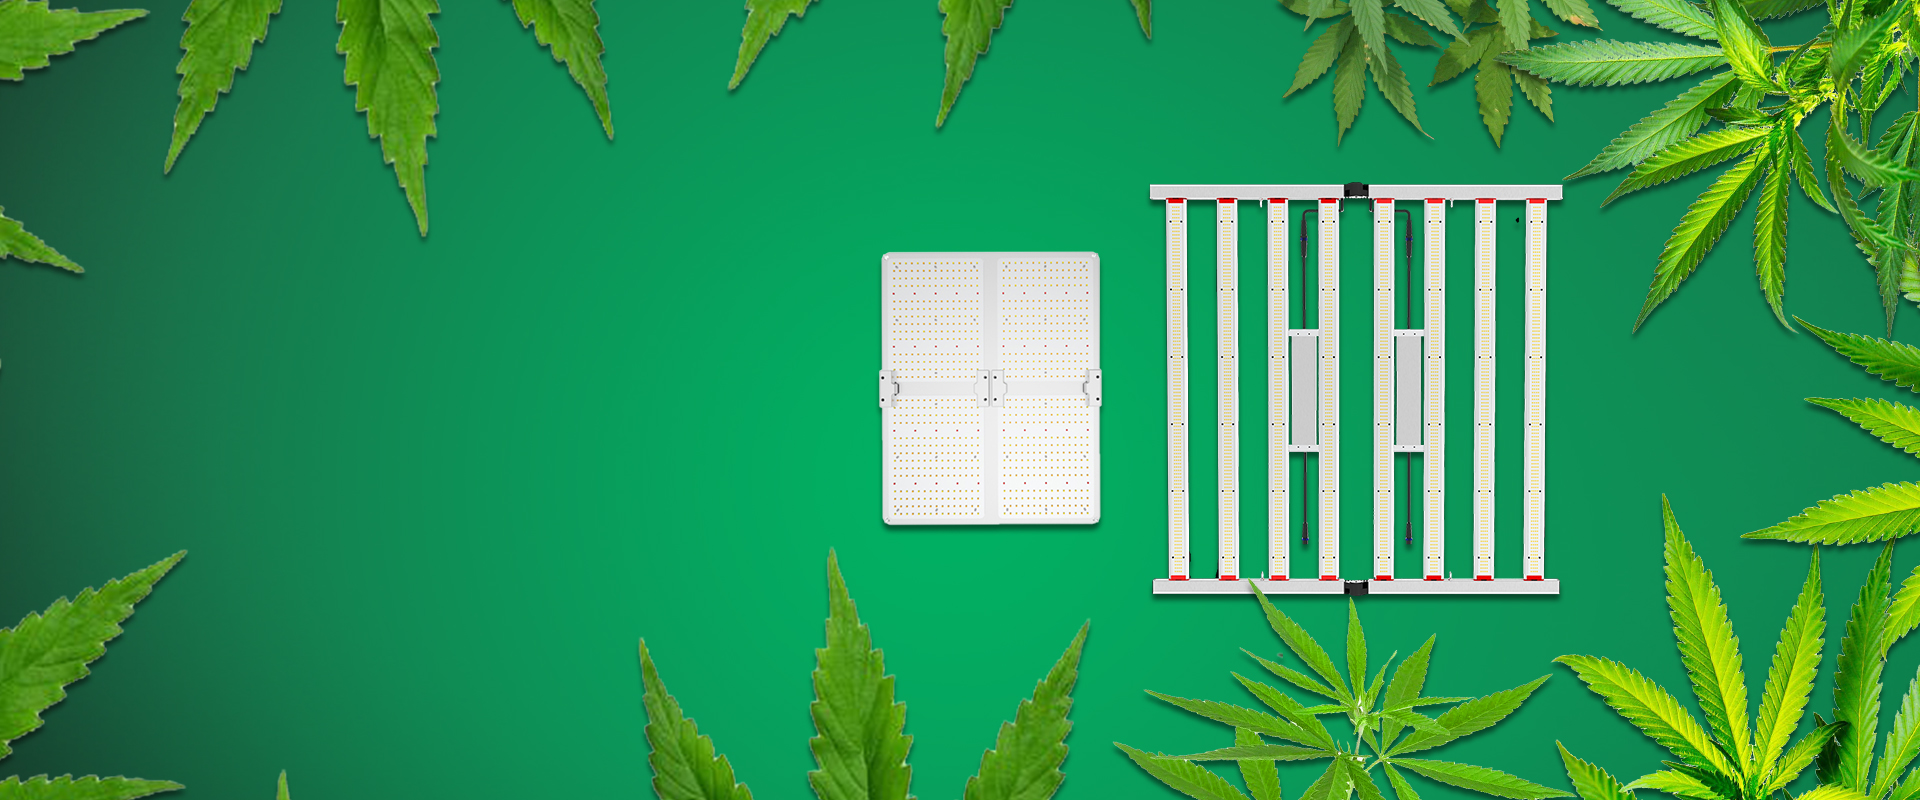
Take into account the overlapping effect when growing with more than one light
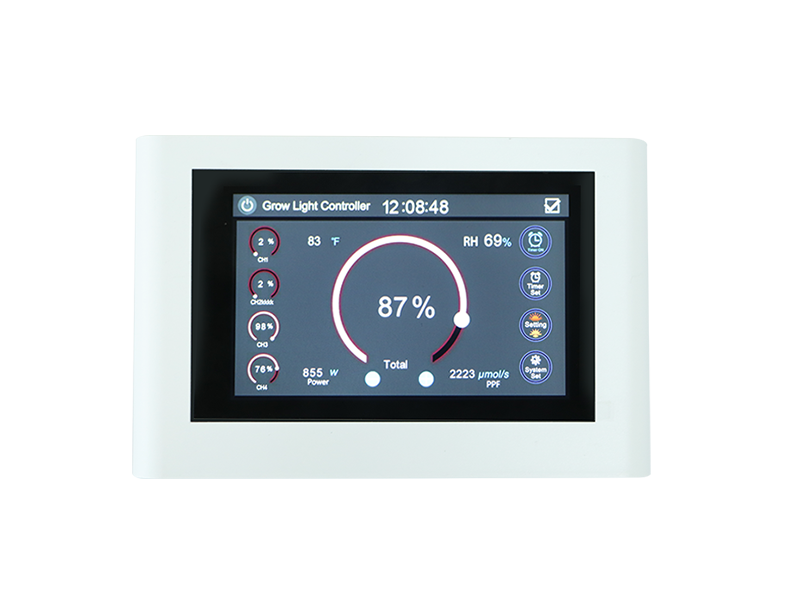
From the design of GLIC650, we have taken into account that instead of concentrating the light output into a small area with very high PPFD, it is more important to provide more even light distribution for commercial growing conditions in which it is very common to install grow lights in the order of a grid. For this reason, the whole optical design of GLIC650 is dedicated to delivering a wider and more even light distribution for enhancing the overlapping effect.
Photoperiod Manipulation
Cannabis, like many plants, matures as the seasons change. When light cycles shorten and light waves lengthen, cannabis plants are prompted to produce flowers or seeds in preparation for the next generation of plants. This happens naturally outdoors as the summer months come to an end and the days get shorter; when the earth begins to turn away from the sun, different light waves penetrate the atmosphere. When it comes to growing cannabis indoors, cultivators must carefully manipulate their plant’s photoperiod (the amount of light versus dark hours) to achieve the same results. While seedlings fare well under constant light, vegetative plants should be kept under a light cycle consisting of no less than 18 hours of light. While some growers will leave their vegetative plants under constant light, it is believed that the healthiest and most bountiful plants receive at least a few hours of darkness within a 24 hour period. Signaling a cannabis plant to flower requires the light cycle to change to 12 hours of light and 12 hours of darkness – no more, no less. The easiest way to do this is with simple timers that plugin between the light source and the power source. These timers can be set to turn on and off at the same time each day to help reduce the chance of grower error.
Please note that cannabis plants are very sensitive to light and must never be interrupted with light during dark hours. We suggest programming lights to turn on during regular daylight hours (when you’re most likely to be tending to them) and off during the hours that you will not need to access them. If you ever do need to view your plants during dark hours, use green lights only.

What about auto-flowering strains?
In recent years, cannabis seedbanks and breeders have developed “auto-flowering strains.” These strains contain genetics from Cannabis ruderalis, a unique cannabis cultivation variety discovered in Siberia that flowers based on age, rather than photoperiod.
Unlike regular cannabis strains, auto-flowering strains will flower after a certain amount of time regardless of the lighting cycle. If you start early in the season you can already harvest your first crop after 7-8 weeks. Just take care you're ready for round two.
#7 Tender you plants carefully as it grows
Ventilate your room
Plants need a continuous supply of fresh air to grow and flourish. If we do not renew the air in the room, the carbon dioxide supply runs out, and the plants stop growing.
Prune your plants

Indoor cultivation is characterized by obtaining buds of good caliber at the top of the plant, while lower branches tend to give less quality. Good pruning will improve the volume and quality of the crop.
Good pruning will improve the volume and quality of the crop.
Watch the pests
Indoor cultivation occurs in a sterile environment, in which there is no natural enemy of pests that attack cannabis cultivation. To avoid unwanted attacks, you have to be aware of the plants and act after detecting the first symptom.
Control the size of the plants
You have to take into account the maximum height at which you raise the focus and the minimum distance between the bulb and the tip of the plants. If we go with the growth, we will have problems in flowering, since the plants stretch a lot. In order not to run the risk of burning the tips, it is better to control the height already during the growth phase.
Watch the humidity
The relative humidity is decisive to ensure good flowering. Too much moisture causes fungi to appear. Very low humidity has an impact on development. We recommend that you keep a value close to 50% during the flowering phase.
Control the temperature
As with humidity, the temperature is decisive to achieve success in cultivation. You can adjust it with an air conditioner or with ventilation. The optimum value for most varieties is around 25 ° C, both in growth and flowering.
Keep it clean
A cultivation room must be impeccable: no dust, no dead leaves or substrate remains in the soil. The cleaner you are, the fewer pests will appear in culture.
Wash the roots
The plant will need to eliminate the possible accumulated salts in the substrate, especially if you have grown with a range of mineral fertilizers. There are numerous products for this purpose, which make the plant yellow, the first symptom that the roots have been washed.
#8 Practices at the cannabis flowering stage
Your cannabis plants have been in the vegetative stage for a while now. They grew in size, developed a vigorous structure, and plenty of fan leaves. When the female plants grow small white pistils from the nodal areas, they’re signaling that it’s time for the flowering phase. During this phase, buds grow and develop a solid cannabinoid and terpene profile. You need to kickstart the flowering phase by changing the light cycle from 18-6 to 12-12 hours of light and darkness. Before we proceed with the details, it’s important to note that the main mistake growers make during the flowering phase is overfeeding plants. Just because buds are forming doesn’t mean that they need to be blasted with fertilizers and boosters; this often leads to nutrient toxicity. As a rule of thumb, fewer nutrients produces better results. If a nutrient deficiency is detected, one should gradually add the necessary compounds into the mix.
The entire flowering stage will be about 8 weeks and consists of the following stages: Pre-flowering, Early flowering, Peak flowering, Late flowering - Maturation stage.
Stage 1: Pre-flowering
Usually, the flowering phase is considered a singular stage, however, there are certain nuances that are valuable to distinguish for best results. When the white pistils (hairs) begin to show in the nodal areas, the pre-flowering stage has begun. At this point, indoor growers switch the light cycle to 12-12, which signals to plants that the fall season has commenced and it's time to develop flowers. It’s important to continue with the regular veg feeding, then gradually shift it to the P-K (phosphorus and potassium) side so the buds can grow and mature.
Novice growers often switch completely from the vegetative nitrogen-rich fertilizers to P-K heavy fertilizers, which often results in disaster. At this point, the buds have barely formed, they only require trace amounts of nutrients. During the pre-flowering stage, the nodal areas will develop more pistils and larger calyxes (cannabis cultivation flowers), which leads to the next stage.
Stage 2: Early flowering
The calyxes are growing in size and the pistils are becoming longer. This is the early flowering stage. The buds resemble round balls with white spines. At this point, the plants are still growing in size and can stretch significantly depending on the strain's genetics. The buds will require slightly more P-K at this stage. If possible, the temperatures should be slightly lowered to around 23°C during the light hours. This will signal to the plants that we’re further into the fall season.
Stage 3. Peak flowering
The peak flowering stage begins when the bud sites merge with one another, forming a long compilation of green calyxes and white pistils. During this stage, the plants should receive higher amounts of P-K, as the buds will now grow significantly in size. This is the stage when growers need to be extremely careful with environmental conditions and feeding. The buds start sucking the soil dry, and are filled with water; it’s logical that more watering is required. The best way to go about this is to simply feel the soil. When the soil dries up, the watering schedule needs to be adjusted. If something goes wrong during the peak flowering stage, the buds won’t grow much in size. Therefore, caution is advised.
Stage 4. Late flowering - Maturation stage
Finally! Buds with substance. White pistils will be sticking in all directions and the buds themselves will be bigger every day. Here’s the last stage in the flowering phase, the maturation stage. At this point, the buds are quite large, dense, and heavy. The white pistils are beginning to curl, turn yellow, orange, then brown. The trichomes turn from see-through clear to cloudy and milky. When left for a longer time, some trichomes will turn amber. If one desires more uplifting effects from the buds, they should be harvested when the trichomes are mostly milky. For more sedating and narcotic highs, one should wait until some trichomes become amber.
During this stage, the nutrient amounts provided should be gradually lowered and nitrogen should be virtually eliminated from the mix. 1-2 weeks before harvesting the plants, they need to be flushed of all nutrients, which are undesirable for consumption. This is usually done by drenching the soil with clear pH-regulated water. This allows the plants to utilize all the stored nutrients. After flushing the plants, the leaves will become yellow and start falling off; at this point, it’s a good sign. When the buds are fully mature, it's time for harvest, which marks the end of the flowering phase.
#9 Cut at the right time
The cannabis harvest cannot be left to chance. There is a time frame, not too long, in which we can harvest our plants. Before that time the herb will be not very psychoactive, while later it will lose organoleptic properties.
You’ll need a microscope to actually observe the trichomes. Handheld microscopes ranging from 30x-100x will allow a clear view of the color of the trichomes and can be purchased at any growing supply store. With a microscope in hand, a grower can see the transformation as the plant reaches peak potency. In this stage, the trichomes shift from clear to an opaque white, from clear to opaque which indicates full maturity. At this point, the trichomes are no longer producing additional THC. Unfortunately, all trichomes do not develop at the same rate and you will begin to see some amber trichomes before you see a consistent opaque. Once amber trichomes appear, CBN is now starting to develop as a result of the THC breaking down due to exposure to oxygen and UV rays. You can presume at this point that you’ve reached maximum THC and your plants are safe to harvest.

#10 Dry and Cure
Drying cannabis is as important as cultivation. After having passed the crop concerned with watering, fertilizing, pruning, treating, etc … we must make a final effort and take care of this stage to the fullest. The wait and the work invested for weeks will only be worth it if we can dry the cannabis cultivation well to begin the curing process and thus be able to taste the tasty buds …
The pre-drying step of female cannabis flowers is a manicure. This process of stripping and cleaning should be done so that all buds end up having a similar size. This facilitates homogeneous drying and will prevent larger buds from passing moisture to smaller ones. The central buds open and separate into medium buds by cutting through the small stems that bind them to the main branch. It is very important to be wearing gloves and good tools such as pruning shears.
At the time of manicuring, the largest leaves that barely contain resin should be separated from the leaves that grow between the buds. The small and medium leaves of the buds stop and can be used for the extraction of hashish once dried. The larger leaves are usually discarded since they contain a lot of chlorophyll and little resin, which gives a very low yield in the extractions. It is also important to clean the scissors from time to time while harvesting, to collect the resin residues of the plants. This work is easier when using a few drops of alcohol.
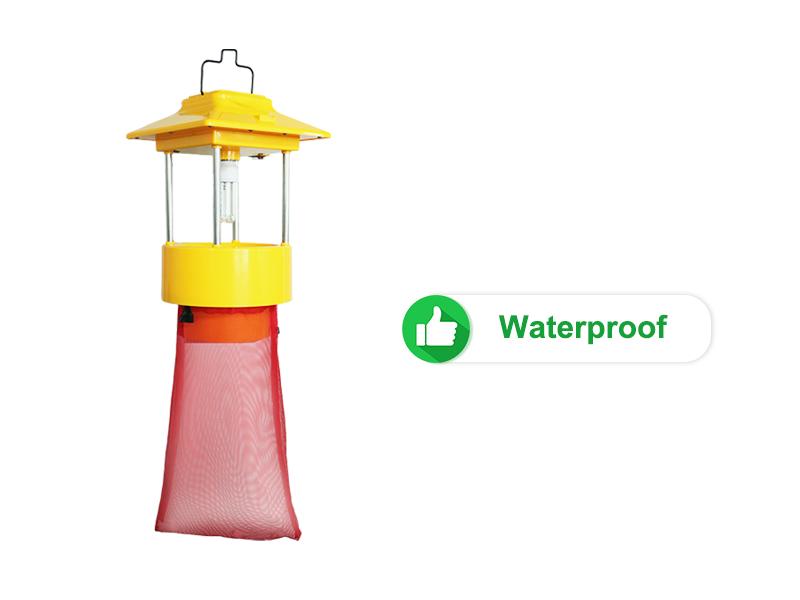
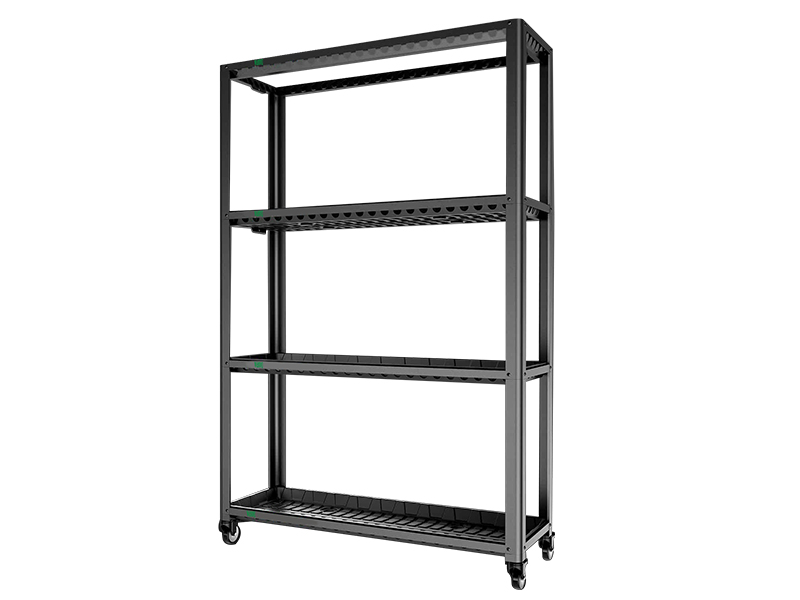
Mesh drying is recommended for large productions. For this type of drying, we have several models, such as the square dryer mesh and the round dryer mesh. These tools allow a great saving of space in the drying room with respect to the second drying technique.
The meshes have several floors, in which we can sort the buds by size or cutting time. We can also dedicate one or more levels for the material for resin extraction, such as undercooked leaves and buds. Whenever we put buds, we must avoid touching each other, to facilitate the process of drying cannabis.
The relative humidity recommended for drying cannabis is around 30 or 40%. This degree of moisture allows the herb to dry in about 10 days, after which time it will be ready for curing. If your drying room is very wet you have the option of starting a dehumidifier with a tank, to reduce the risk of rot and drying time.
To make sure that moisture pockets do not form, the air flowing through the room must be removed with a small fan, such as the Cyclone floor fan. It is placed in a corner of the room with the flow not directly to the buds, so that it removes the air but does not shake the plants too much.
Another very important factor is temperature. The aroma and taste of cannabis are largely due to molecules called terpenes. These compounds are volatile and are lost by heat. In order not to lose aroma or taste, cannabis should never be dried at more than 25º C.
If we make sure we have good air circulation, we only need to monitor the temperature and relative humidity with a digital thermohygrometer, and regulate the fan and humidifier to adjust them to the desired level.
It is also essential that the room is dark so as not to degrade the molecules that give the herb its qualities. In the presence of light, THC degrades in less psychoactive forms such as CBN. The presence of this cannabinoid in cannabis cultivation samples usually means a bad drying or curing process. If you follow all these tips for drying the cannabis after one or two weeks the buds are ready to be stored and begin to cure (usually when the plant stems already begin to creak when bent by hand). As regards curing, storage in glass jars or tight-vac containers is recommended. These are perfectly closed with the lid and there is no exchange of air with the outside environment. This favors that the humidity level of the vegetal matter in its interior is homogenized and that the transformation of the cannabinoids is gradual. Once packaged, the herb should be protected from sudden changes in temperature and the incidence of sunlight. The quality of the product will improve with the weeks and months until reaching a maximum quality around the year of curing.


